
When COVID struck and my state went into “stay at home” orders, I began looking for projects to do around the house…and after knocking out a few “honey-do” items, it was time to finally tackle the garage.
Since we own the house, it made sense to put a little money and effort into the garage to make it look nice…but on the other hand, it’s a small garage and I’d rather spend the money on my car, so I didn’t want to go overboard either.
I gave myself a budget of $1,000 which I figured was more than enough to make an improvement and possibly add some value to the house, but not so much that it would be a total waste of money.
It’s been several months since I finished the project, and I’m THRILLED with the outcome.
BEFORE:

AFTER:

I like to wait before posting a project to my blog so I can talk about the long-term reliability and durability of anything I do, so now that it has been close to four months I feel I can confidently say I nailed it.
I started by looking for flooring, knowing this would make the biggest expense and also cause the biggest impact to the finish.
This decision was the hardest to make, but looking back I’m very happy with the route I took…
Garage Flooring: Epoxy or Tiles?

The original concrete floor that was poured when the house was built (1980s) was starting to really look old. It has multiple cracks and was never painted or epoxied, so there were also stains to deal with.
The two main options people choose from is an epoxy finish or getting tiles.
They both look great, and both have plenty of customization options including different colors, patterns, etc.
I did a ton of research and ultimately landed on the tiles for their ease of install and lower price…but that might not be the right decision for you, so I’ll include the pros & cons of each below.

Pros of Garage Tiles:
- Easy to DIY install – little to no prep work, clicks into place with no tools (rubber mallet helpful, but not required)
- Cool looks – you can have a number of patterns and colors to your tastes
- Easy to replace – if one breaks or gets discolored, you can swap out an extra tile
- You don’t have to do the entire floor, if you want to skip certain areas (our washer/dryer is in the garage, and I didn’t want to have to take these out, so I can just cut the tile around it).
- 2 Car Garage costs about $800 to tile, versus $1500+ for a professional epoxy job
- No dry time, takes 1-2 hours to install, and can be used immediately
Cons of Garage Tiles:
- A little slippery from a texture perspective – in hindsight I’d probably get the vented ones
- Jack stands – they are supposed to be jack-friendly, but I’ve noticed a few times that they stress under the pressure and I wouldn’t want to leave a project car on jack stands for extended periods of time
- Hard to make fully flush around corners, etc. (manually cut them)
- They look dirty easily if you pick a lighter color, and especially if you don’t get vented ones
Pros of Epoxy Flooring:
- Looks incredible – high gloss with lots of customization options
- DIY solution is cheaper (about $500 in parts) but a lot of work
- Better if you’re going to work on your car a ton as you’ll have a smoother surface and the jack/jack-stands are directly on concrete
Cons of Epoxy Flooring
- Much more prep work needed – fill in cracks, ensure you have a level floor, etc.
- Drying time required – unlike the tiles were you can drive on it immediately after installing, you need to let this dry a few days
- More expensive if professionally installed
- Have to completely empty your garage first, as you’ll need to cover the entire floor (no cutting around shelves or washer/dryer units)
- Paint can chip or discolor over time and no good way to do “touch ups” so you’ll need to redo it
For the DIYer, I believe the garage tiles are the way to go. It’s way cheaper than epoxy and something you can easily do yourself in a few hours, as opposed to epoxy which requires either a professional or a few days worth of work for a DIYer.

I also LOVE the checkerboard look, but I admit that is a subjective factor.
Garage Tiles Installation
I ordered the tiles from https://www.garageflooringinc.com/ and they arrived in about a week. I bought the recommended amount for a two car garage, along with the edge pieces for the entry to the garage. The total amount after using a promo code was just over $800 including shipping.
The tiles arrive on a pallet in boxes sorted by color so you can do the checkerboard pattern if that is how you ordered them:

Installation is SUPER easy!
I started by cleaning out the garage of any junk I no longer needed, and then moving the cars out and any large items I could out of the way, but obviously leaving the big things I planned to keep in place like the washer/dryer, shelves, etc.
Otherwise I did no prep-work other than to pressure washer the garage floor first so that I was starting with a clean surface. While I was at it I also pressure washed the walls, garage door, and any other surfaces that made sense which was long overdue.
From there, the panels click together like lego sets, so start in one corner and fill the entire garage up until the edges.
You’ll then use a Dremel tool with a cutting wheel to cut any end pieces to as close to the wall as you can go, which is the only tedious part.

All said and done, it took under 2 hours for me to install the tiles using nothing but a rubber mallet and a dremel tool.
Garage Tiles Long-Term Reliability
I’m happy with the tiles, but there are a few downsides…
The first one is keeping them clean. I picked up a cordless leafblower to blow out any dirt and debris which helps, but after you wash the car (or it’s raining or snowing) the car tracks in wetness. With a solid tile (no vents/holes) that water gathers on the surface and causes the tiles to look dirty pretty fast:

The other challenge or concern is how they’ll hold up to repeated lifting and lowering the car on jack stands. The tiles are meant to withstand this kind of use, but it does make me a little nervous compared to epoxy/concrete. That being said I’ve worked on my car several times and most tiles show no damage, and only one had a little “crunch” noise and some slight wear but nothing too concerning:

At the end of the day, I’m not too worried about either shortcoming.
The tiles seem plenty durable for an hobbyist like me who works on his car a few times a year but not all of the time, and I can manage to occasionally mop down or pressure wash the tiles when they start to look dirty (as I’d imagine you’d hav to clean the epoxy floor occasionally too).
Garage Lighting Upgrades
While there are some extreme overhead lighting upgrades I’ve seen done for professional detailers, I wanted something cheap but effective over the halogen lights installed in my house originally.
I stumbled across these LEDs on Amazon that I had seen an ad for before and decided to give it a go.

The light output is UNREAL.
It is so bright it’s almost kinda funny.
The downside is you notice every swirl mark and imperfection in your paint, but the upside is that the visibility is amazing, and when you are detailing being able to see those swirls is actually a good thing.

The mount like a normal light bulb, although you may need an extender depending on the fixture. They also come with new bases if you need to rewire any fixtures from older-style bulb types or those weird circular ones like my garage originally had.
At about $50 per set I got two sets so that the front and rear half of my garage could be super bright, bringing the grand total of my project to around $900.
Pictures, Frames & Miscellaneous
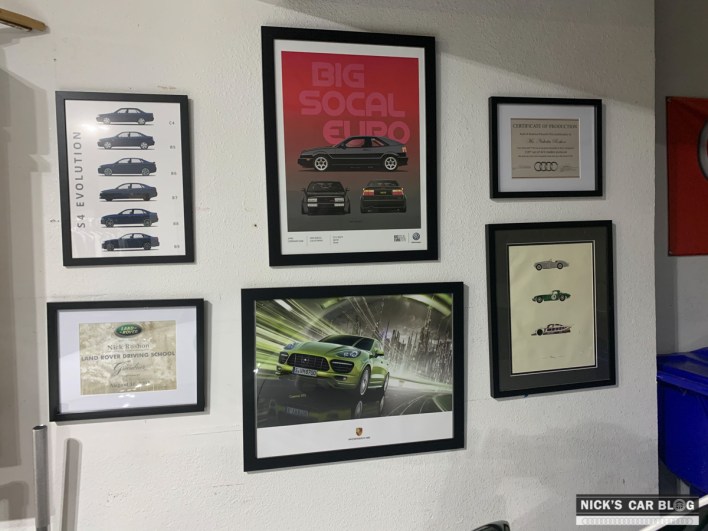
I spent the remaining $100 or so of my budget getting all of the car posters I had framed, and picking up a few more posters to add to my collection.
The frames really improve the look of the pictures, and will also help them last longer. You can buy them in sets, as most posters are either 18×24 or 24×36, so it makes sense to have all of your frames match.

I also picked up some new posters to honor my last two cars – the Cayenne GTS and the 8J Audi TTRS

I finished things off with a collection of license plates I’ve collected over the years, including a few hand-me-downs from my dad and grandpa:

Garage Makeover Summary
If you want to update your garage on a budget, consider picking up garage tiles (about $800 for a 2 car garage), some LED lights, and then a few pictures on the walls and your space can go from zero to hero pretty quick. The epoxy floor system is a better choice if you plan to have your car on jack stands a lot, or if you have a newer garage floor that doesn’t ned any patchwork or repair, otherwise the tiles are easier to install and more forgiving for an imperfect surface underneath.


I LIKE IT
I must say, I wasn’t confident about Epoxy Flooring ’till I saw it. It actually looks good.
Looks great! I’m moving into a new space and wondering how you felt about overall coverage of the lighting from those LED ones you got? My worry is the dispersion of the light and avoidance of shadows.
I ended up getting longer tube style ones when I moved, and those are great if you can swing it, and not much more money. I actually have both – replacing the existing overhead bulbs with LEDs like in this post, then adding the longer tubes over the cars, so everything is well lit.